Table of contents
- Git Branching
- Scenario based example on how Git branching works:
- Git Reset
- Scenario based example on how Git Reset works:
- Git Revert
- Scenario based example on how Git Revert works:
- Did you get confused with Revert and Reset?Are they working same?
- Git Rebase
- Scenario based example on how Git Rebase works:
- Git Merge
- Scenario based example on how Git Merge works:
- Tasks of Day 10
- Solution for Task 1:
- Solution for Task 2:
Hello Readers,
Here we are Day 10 of #90daysofdevops
👣 Topics for #day10
Git Branching
Git Reset and Revert
Git Rebase
Git Merge
Tasks of Day 10
Git Branching

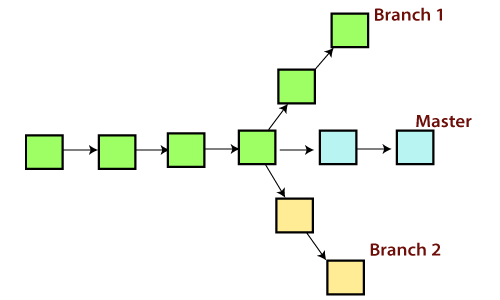
Git branching is a powerful feature of Git that allows developers to
Create separate branches of their codebase,
make changes to those branches independently, and
merge those changes back into the main codebase when they are ready.
Scenario based example on how Git branching works:
Suppose you are a software developer working on a web application for a company. The application is still in development, and you need to make some changes to the codebase to add a new feature.
However, you don't want to make changes to the main codebase that could potentially break the application for other developers who are working on the project.
Here's how Git branching can help:
Create a new branch: Before you start making changes, create a new branch in Git. This branch will be a separate copy of the codebase that you can work on independently of the main codebase.
You can do this by running the command
git branch <new-branch-name>Switch to the new branch: Once you've created the new branch, switch to it by running the command
`git checkout <new-branch-name>`.Now, any changes you make to the codebase will only affect the <new-branch-name> branch.
Make changes: Now that you're working in the <new-branch-name> branch, make the changes you need to add the new feature. You can add new files, modify existing files, or do whatever else is necessary to implement the feature.
Commit changes: Once you've made your changes, commit them to the <new-branch-name> branch using the command
git commit -m 'added new feature'Merge changes: When you're ready to merge your changes back into the main codebase, switch back to the main branch using the command
git checkout main. Then, merge the changes from the <new-branch-name> branch into the main branch using the commandgit merge new_feature. This will bring all of the changes you made to the new feature into the main codebase.
By using Git branching, you can work on new features or bug fixes without worrying about breaking the main codebase. Once your changes are complete, you can merge them back into the main codebase and continue working on the next feature or bug fix.
Git Reset

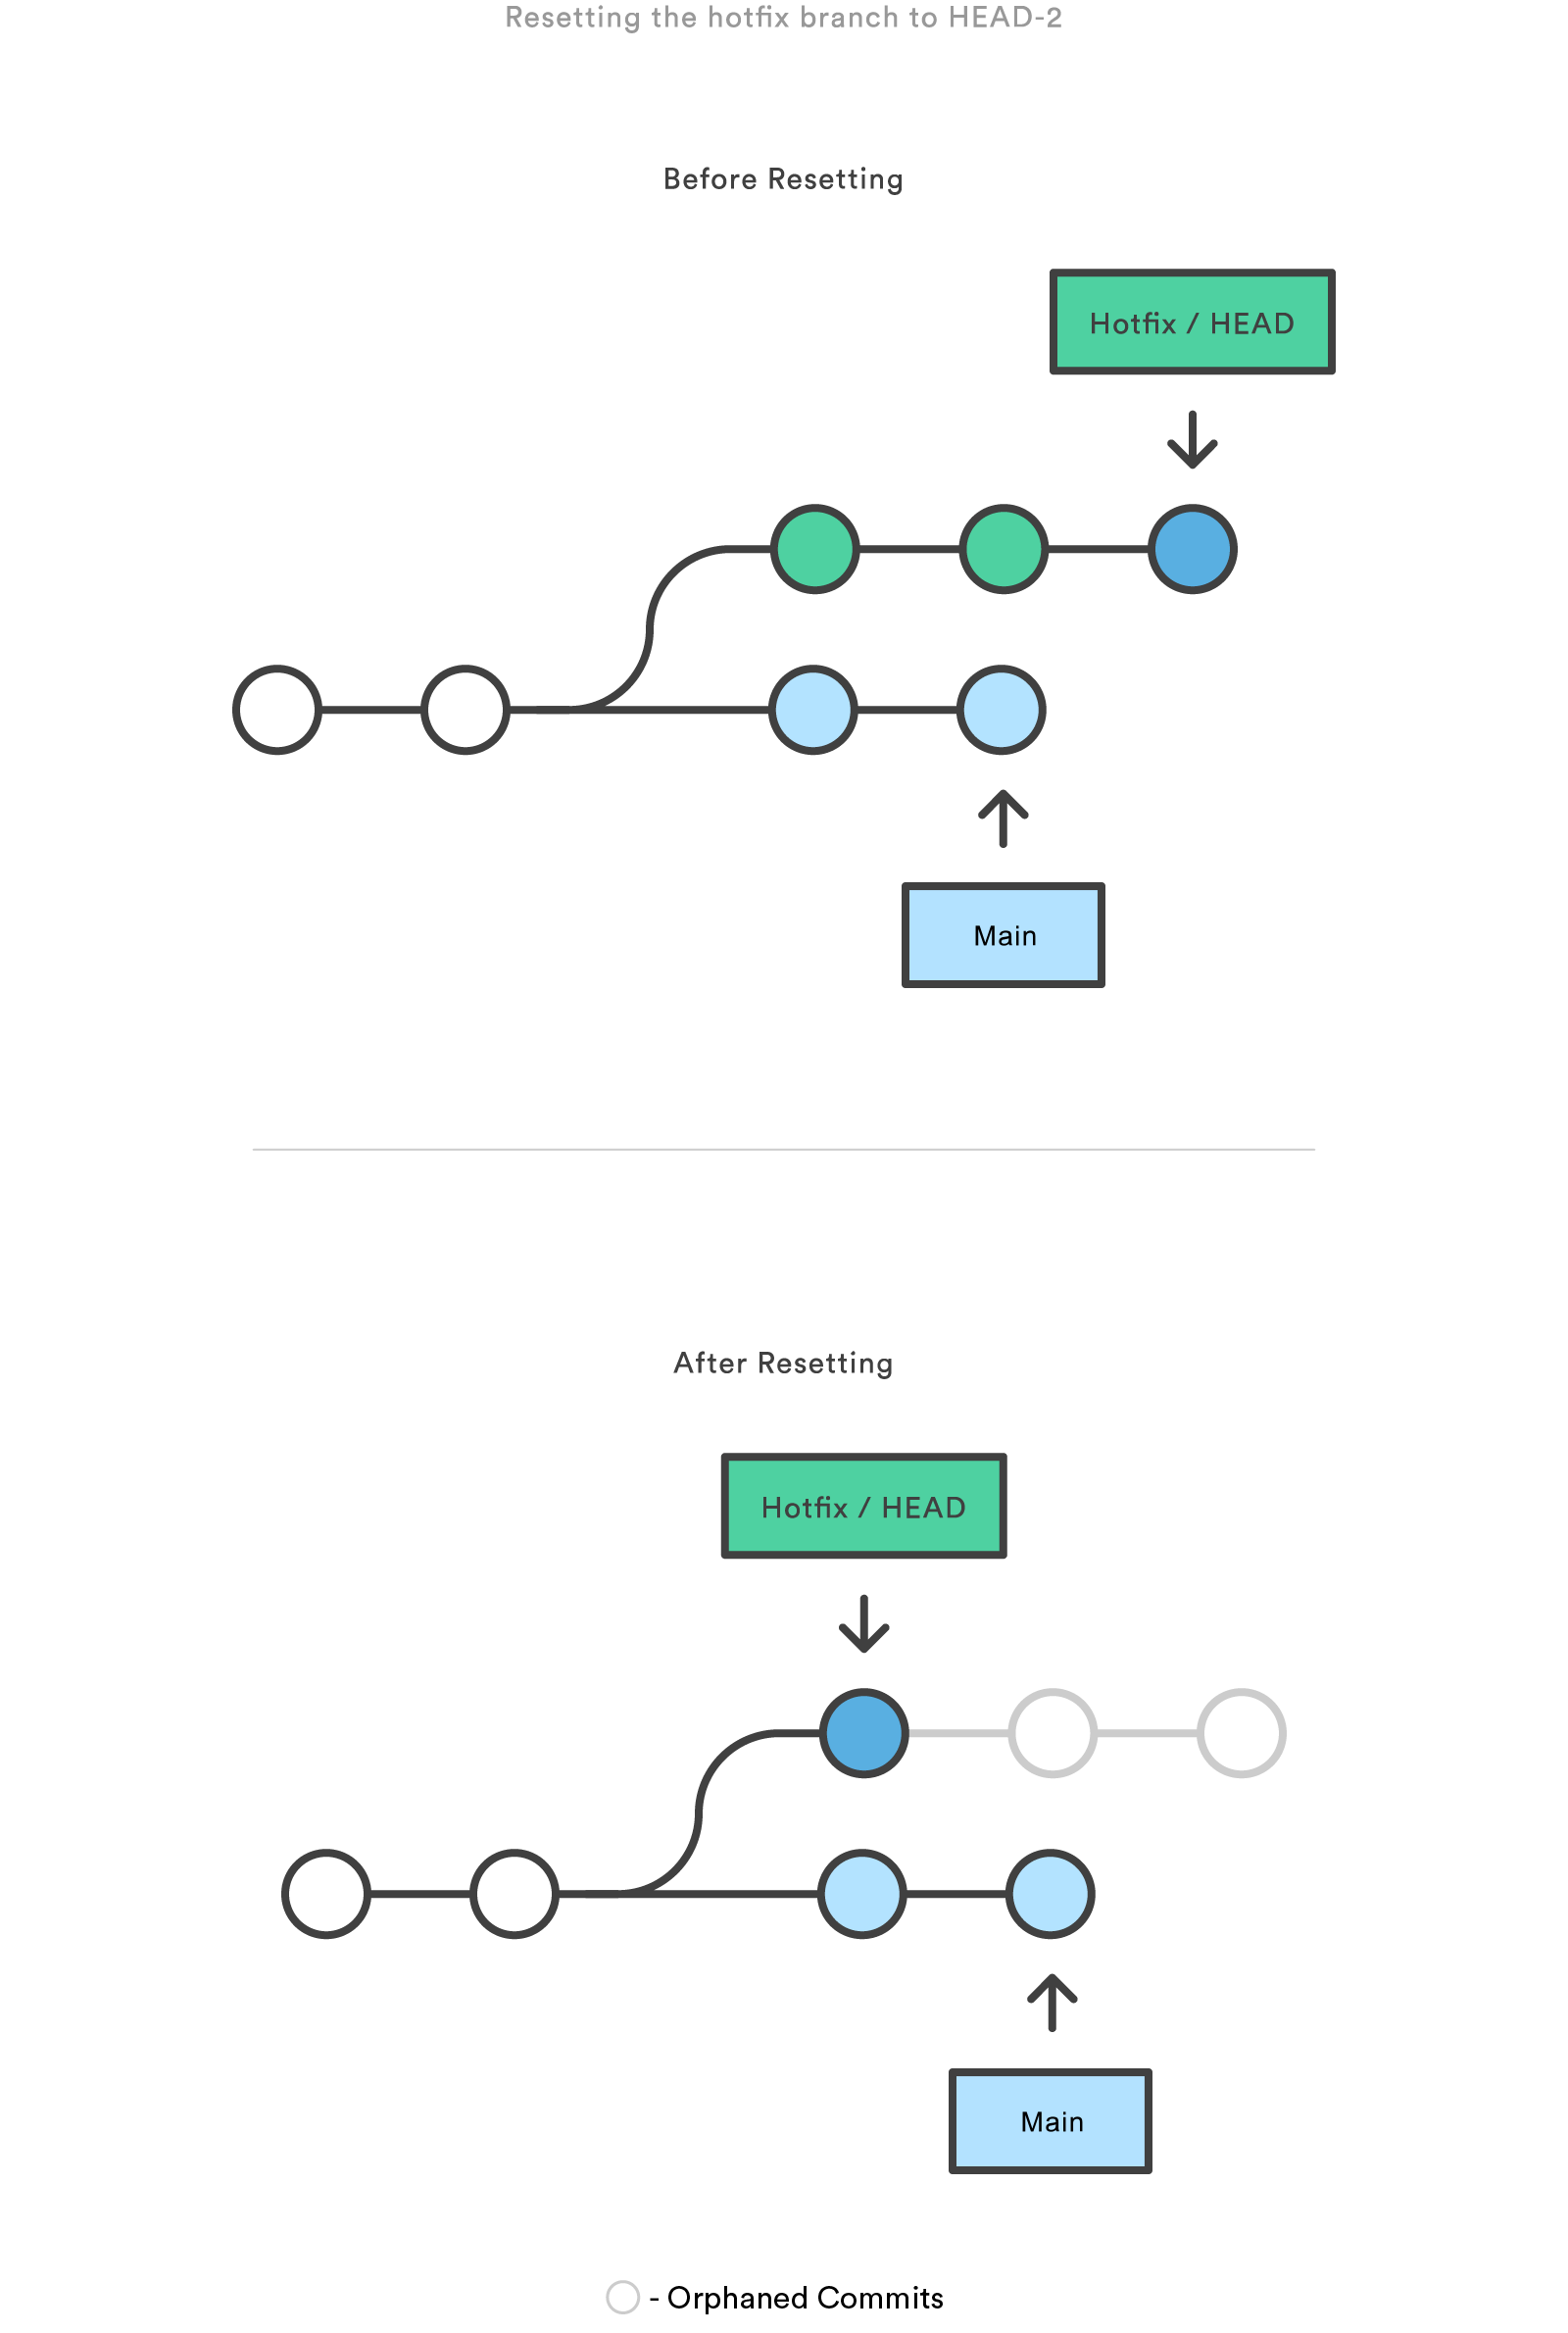
Git reset is a command that allows you to reset the current branch to a specific commit, discarding any changes made after that commit. This can be useful if you want to undo changes that you have made and start over from a previous state.
Scenario based example on how Git Reset works:
Suppose you are a developer working on a project and you accidentally make some changes to a file that you didn't intend to make. You want to undo those changes and go back to the previous commit.
Here's how Git Reset can help:
Identify the commit: Use the
git log --onelinecommand to identify the commit that you want to go back to. Note down the commit ID/hash code.Use Git reset: Run the command
git reset <commit ID>. This will reset the current branch to the specified commit, discarding any changes made after that commit.
Git Revert

Git revert is a command that allows you to undo a commit by creating a new commit that undoes the changes made in the original commit. This can be useful if you want to undo a commit but still keep a record of the fact that it was made.
Scenario based example on how Git Revert works:
Suppose you are a developer working on a project and you accidentally commit a change that you didn't intend to make. You want to undo that commit but still keep a record of the fact that it was made.
Here's how Git Revert can help:
Identify the commit: Use the
git logcommand to identify the commit that you want to revert. Note down the commit ID/hash code.Use Git revert: Run the command
git revert <commit ID>. This will create a new commit that undoes the changes made in the original commit.Review and commit: Review the changes that were made in the new commit, and make any necessary adjustments. Then, commit the changes using the command
git commit -m 'reverted <commit ID>'.
Did you get confused with Revert and Reset?Are they working same?
Here I will show you the main difference between Git Revert and Git Reset.

Git Rebase

Git rebase is a command that allows you to change the order or content of commits in a Git branch. It does this by applying the changes made in one branch onto another branch.
Scenario based example on how Git Rebase works:
Suppose you are a developer working on a project and you have two branches, feature A and feature B. You have been working on feature A and have made several commits to that branch. However, you now realize that some of those changes should have been made on feature B instead.
Here's how Git Rebase can help:
Identify the branch: Use the
git branchcommand to identify the branch you want to apply changes to. In this case, it's feature B.Use Git rebase: Run the command
git rebase feature A. This will apply the changes made in feature A onto feature B, so that any commits made in feature A will now be included in feature B.Resolve conflicts: If there are any conflicts between the two branches, you will need to resolve them before you can continue. Use the
git mergetoolcommand to resolve any conflicts.Commit changes: Once you have resolved any conflicts, commit the changes using the command
git commit -m 'merged feature A into feature B'.
Git Merge

Git merge is a command that allows you to combine changes from one branch into another branch. It creates a new commit that combines the changes from both branches.
Scenario based example on how Git Merge works:
Suppose you are a developer working on a project and you have two branches, feature A and feature B. You have completed work on both branches and want to combine the changes into a single branch.
Here's how Git Merge can help:
Identify the branch: Use the
git branchcommand to identify the branch you want to merge into. In this case, it's feature B.Use Git merge: Run the command
git merge feature A. This will combine the changes made in feature A into feature B, creating a new commit that includes the changes from both branches.Resolve conflicts: If there are any conflicts between the two branches, you will need to resolve them before you can continue. Use the
git mergetoolcommand to resolve any conflicts.Commit changes: Once you have resolved any conflicts, commit the changes using the command
git commit -m 'merged feature A into feature B'.
Tasks of Day 10

Solution for Task 1:


Before Push

After Push

Note: Look at the Branch
1st line>> This is the bug fix in development branch
Commit this with message “ Added feature2 in development branch”

2nd line>> This is gadbad code
Commit this with message “ Added feature3 in development branch"

3rd line>> This feature will gadbad everything from now.
Commit with message “ Added feature4 in development branch"

Git Reset:

Before:

After:


Solution for Task 2:

Adding new Branch:

Switching between Branches:

Adding files from dev branch:

Writing some content in new file from dev Branch:

Merging these changes to master Branch:
Before Merge:

After Merge:


Thank you for reading my Blog. I hope you have learnt something from it! If you find this blog helpful, please like, share, and follow me for more interesting posts like this in the future.
Please navigate to my GitHub Repo: GitHub Repo Link
to check my solutions for the tasks of 90daysofdevops Challenge.
